Picture-In-Shape provides a very thorough picture in picture effect that allows you to select an arbitrary section of an image and resize and move it anywhere on screen.
Setup
Place the Picture-In-Shape effect on the clip that should be inserted over the background and place the background track behind it. Use the Frame controls to define which area of the picture you want to use. Then use the Placement controls to set where the image is placed over the background and how large it will be. Finally, if you wish to add a drop shadow to the image, use the Drop Shadow controls.
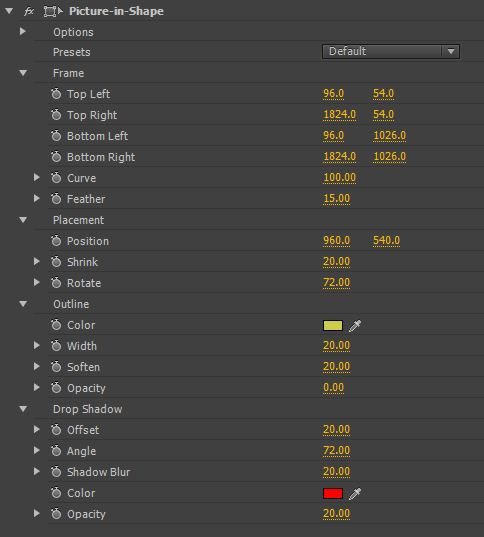
- The Shape group lets you define the picture area by picking the four corners of the image.
- Curve sets the roundness of your Shape. With Curve set to 100, your shape will be an oval. With Curve set to 0, your shape will be a rectangle. .
- Feather determines the sharpness of the edge of your selected area. With Feather at 0, the edges of the picture will be sharp and clearly defined. As you increase Feather, the edges of the picture will become softer and blend more into the background.
- The Placement group sets up how the embedded picture is displayed.
- Position sets the position of the picture.
- Shrink sets the size of the picture, from one pixel to the full image.
- Rotate rotates the picture flat on the screen.
- The Drop Shadow group sets up the rendering of a drop shadow under the picture. Note that the shadow incorporates both the picture and its border.
- Offset sets the distance of the shadow.
- Angle sets the direction of the shadow.
- Shadow Blur sets the amount of blurring in the drop shadow. It uses the outline of the border as its edge, so if the border itself is blurred, the shadow starts with the blurred border outline and blurs it even more.
- Color sets the drop shadow color.
- Opacity sets the visibility of the shadow.