What it does: Re-creates the blur caused when an object or the camera moves quickly.
How to use it: Use the controls to set the length of blur, its angle and mix with the original picture.
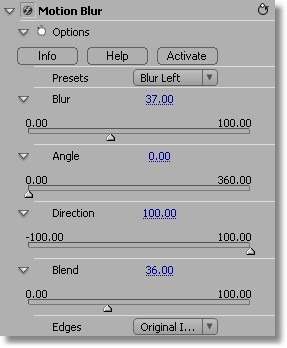
- Blur set the length of the blur. Drag right to increase the blur length. Drag left to decrease.
- Angle set the direction of the blur in degrees
- Direction set the direction of the blur around the original image. Use this in conjunction with Angle to set the shape of the blur. By default, the blur direction is 0, indicating a blur with the original image in its center. Drag to the left to shift the blur to the left side of the image or Drag to the right to shift the blur to the right (of course, with a changed Angle, the direction may be up and down, etc.).
- Blend set how much of the blur to mix in with the picture. With Blend set all the way to the left, the blur disappears. Drag to the right to increase the percentage of blur until the original picture is completely replaced by the blurred image.
- Strong blurs result in faded picture edges. This occurs because the original image is shifted in one direction to create the blur. To solve this, select "Original Image" from the Edges menu. This causes the original picture to be mixed in at the edges. Although this solves the problem of faded edges, it results in a picture edge that is sharper at the edges, which may or may not be desirable. If not, selected "Blank" and the image fades out at the edges. The fade level is stored in the alpha channel so you can composite another image or solid color behind the blurred image.